Enable Local Harbor Image Registry
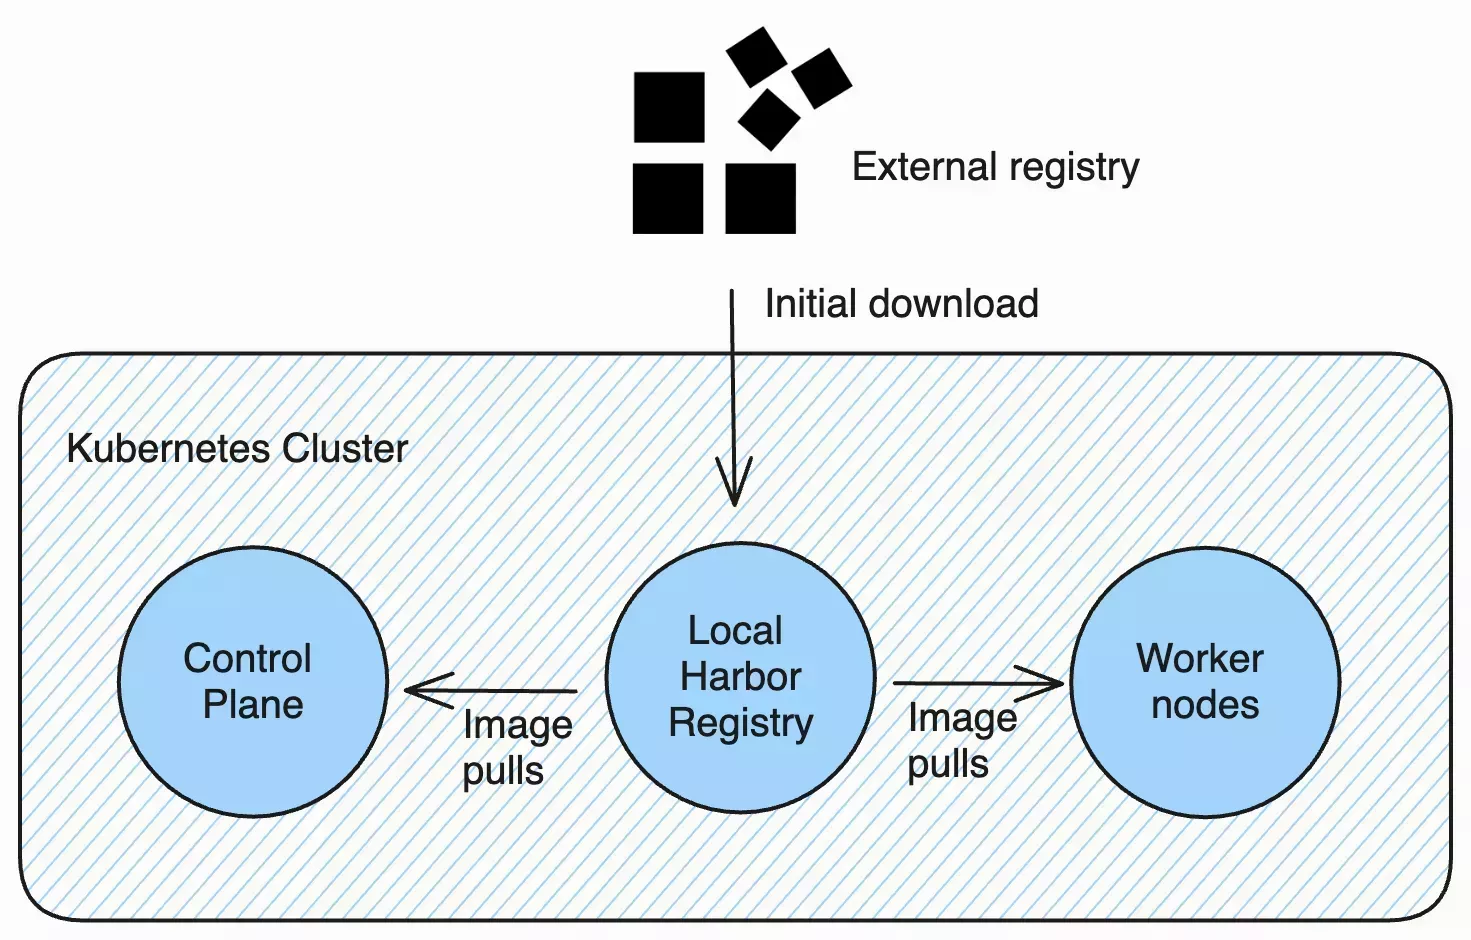
Palette Edge allows you to provision a local Harbor image registry as part of your Edge deployment. When your Edge cluster is created for the first time, all images downloaded from external registries are stored locally in the Harbor registry, including your provider images and all packs used by your cluster. Subsequent image pulls from the cluster are made to the local Harbor registry. This allows your Edge cluster to reboot containers or add new nodes without being connected to the external network.
Prerequisites
-
At least one Edge host registered with your Palette account with an AMD64 or x86_64 processor architecture.
-
Each of your Edge hosts must have at least 4 CPUs and 8 GB of RAM.
-
At least 160 GB of persistent storage. The actual amount of storage required depends on the size of your images.
-
An Edge cluster profile. For information about how to create a cluster profile for Edge, refer to Model Edge Cluster Profile.
Enable Local Harbor Registry
-
Log in to Palette.
-
Navigate to the left Main Menu and select Profiles.
-
Select the profile you plan to use for deployment and create a new version of the profile.
-
If the profile does not already have a storage layer, click Add New Pack to add a storage pack. You can choose any storage pack for your storage layer.
-
Select the Kubernetes layer of the profile. Under
cluster.config.kube-apiserver-arg, removeAlwaysPullImagesfrom the list itemenable-admission-plugins:
kube-apiserver-arg:
  - anonymous-auth=true
  - profiling=false
  - disable-admission-plugins=AlwaysAdmit
  - default-not-ready-toleration-seconds=60
  - default-unreachable-toleration-seconds=60
  - enable-admission-plugins=NamespaceLifecycle,ServiceAccount,NodeRestriction
-
Click Add New Pack and search for the Harbor Edge Native Config pack. Add the pack to your cluster profile. For more information about the pack and its parameters, refer to Harbor Edge Native Config pack documentation.
-
In the
harbor-config.storageparameter, make sure you allocate enough storage in theregistryfield to store all your images. -
Click Save Changes.
-
Deploy a new Edge cluster with your updated profile. Or, if you have an active cluster, update the cluster to use the new version of the cluster profile. The initial download of the images will require a connection to the external network as the images are sourced from the original repository. Subsequent image pulls are sourced from the local Harbor registry.
Validation
-
Log in to Palette.
-
From the left Main Menu, navigate to Clusters. Choose your Edge cluster.
-
Navigate to the Nodes tab, in the Private Ips column, you can find the IP addresses of your Edge hosts.
-
Ensure you have network access to your Edge hosts. Open a new tab in your browser and navigate to
https://NODE_IP:30003and replaceNODE_IPwith any IP address in your cluster. NodePort-type services are exposed on the same port on all nodes in your cluster. If you changed the HTTPS port in the configurations, replace the port with the HTTPS port you used. -
If you didn't provide a certificate or used a self-signed certificate, your browser might warn you about an unsafe connection. Dismiss the warning, and you will be directed to Harbor's web UI. If you are using Google Chrome, you can click anywhere in your browser tab and type
thisisunsafeusing your keyboard to dismiss the warning. -
Type in your credentials to log in to Harbor. The username is always
admin. The password is what you configured during cluster creation. If you don't know your password, refer to Retrieve Harbor Credentials to retrieve your password. -
In the Projects view, select the spectro-images project.
-
Confirm that all images required by the cluster are stored in the project.